Sync-n-Share Nextcloud Sandbox with Desktop Clients
Update: I’ve updated the titles for the first two articles in my Nextcloud series to explicitly identify the target environment being a “sandbox”. The purpose of the sandbox is to develop comfort with Nextcloud before deploying to a production instance where the safety and security of data become critical. I have another article which provides step-by-step instructions for a secure production deployment.
Background
In the first article in this series I described how to to install Nextcloud on Ubuntu 16.04. To actually make use of Nextcloud’s sync-n-share capabilities you need a few clients.
In this article I will cover:
- Enabling port forwarding to utilize the dev Nextcloud server I’ve installed on a VM
- Installing and using the Nextcloud clients on Ubuntu and Windows
- Architecting a production-ready solution with docker
Port Forwarding
To make requests to the Nextcloud server on my VM from other devices on my home network, I need to set up port-forwarding on my the VM host.
I’m going to use iptables but other firewall management programs can be used as well.
My objective is to forward http/https requests sent to my Kubuntu
Desktop (192.168.0.10) from other home network devices to the Nextcloud
VM (192.168.122.30).
Because my desktop is routing traffic from the VM network
(192.168.122.0/24) I will already have some iptables rules enabled.
Because this is just for temporary development usage, it’s easier to
flush (delete) the rules instead of trying to work with them (note: this
will prevent your VMs from connecting to the internet).
When I reboot the machine, KVM will put those rules back in place so these changes will not be permanent. But, if you want, you can save the rules to file so you can restore without rebooting:
sudo iptables-save > iptables.copy
Flush the rules in both the (default) filtering table and the nat (network addresss translation) tables:
sudo iptables -F
sudo iptables -t nat -F
Now add a pre-routing NAT rule for http & https. Note also that you
likely want to replace 192.168.0.10 with your own host IP.
sudo iptables -t nat -A PREROUTING -p tcp --dport 80 -j DNAT --to-destination 192.168.122.30:80
sudo iptables -t nat -A PREROUTING -p tcp --dport 443 -j DNAT --to-destination 192.168.122.30:443
Here’s a breakdown of what the command is doing doing:
-t nat: edit the network address translation table-A PREROUTING: by appending a rule to the pre-routing chain-p tcp: for protocol tcp--dport 80: when destination port of incoming packet is 80 (http)-j DNAT: jump to a destination-NAT of ….--to-destination 192.168.122.30:80: ip 192.168.122.30, port 80
Finally, we need to add masquerading so that the Nextcloud server sends the packets back with a destination of the KVM host.
sudo iptables -t nat -A POSTROUTING -j MASQUERADE
Verify Port-forwarding with Windows
I’m verifying the firewall settings are correct with my Windows laptop. This is, of course, possible with Linux or Mac, just substitute the step for updating the static hosts file.
First, let’s make sure port-forwarding is working. Enter this url in any web browser: http://192.168.122.30
If haven’t yet deleted it, you should see the Apache2 Ubuntu Default Page
But for Nextcloud to work we need use the hostname because
192.168.0.10 is not one of Nextcloud’s trusted domains.
In Windows, we do this by appending the following line to
C:WindowsSystem32driversetchosts:
192.168.0.10 cloud1.example.vm
Now, in a browser, enter https://cloud1.example.vm/nextcloud
You will need to add the security certificate exception as in the previous article
If successful, you should see a login page. Leave this open as we’ll be using this in the next step.
Create a Non-Admin User
If you haven’t yet. You should create a non-admin Nextcloud user. Log in
as nextadmin.
Click on nextadmin in the top-right corner and select Users. The
first line on the Users page allows you to create a new user very
easily:

Let’s create a user called cloudboy and give him a password. You can
also create groups but we won’t bother with that now.
Try logging out then back in as cloudboy to confirm it worked.
Client Install & Usage – Windows
We already updated the host file, so everything else in Windows will be super straight forward.
Go to https://nextcloud.com/install/#install-clients
Click Windows. This will download the executable. When the download is
done complete the install with all the default options selected. A
successful install should end with the launch of a Nextcloud Connection Wizard:

Enter the URL: https://cloud1.example.vm/nextcloud
You will need to accept the untrusted certificate then enter cloudboy’s username and password.
The installer will ask you what to sync. You can keep or change the defaults. Once this is done, the files should be downloaded in the local folder.

Try adding files through both the web interface and local filesystem and see the results. It should all be very intuitive!
Client Install & Usage – Ubuntu
At the time of this writing, there is no installable Nextcloud binary for Ubuntu. I was able to install from source after some mucking about with dependencies and other troubleshooting but I wouldn’t recommend it.
Let’s instead use the ownCloud client available through the Ubuntu package repository which works just fine with the Nextcloud server (for now). As the projects diverge this may change, but hopefully at that point we can easily install a Nextcloud client on Ubuntu.
What is ownCloud and how does it differ from Nextcloud? You’ll want to read some background on the ownCloud and Nextcloud split.
sudo apt install owncloud-client
On next reboot, the client will run automatically. Until then, you can
run owncloud from the console or find the client in the start menu:

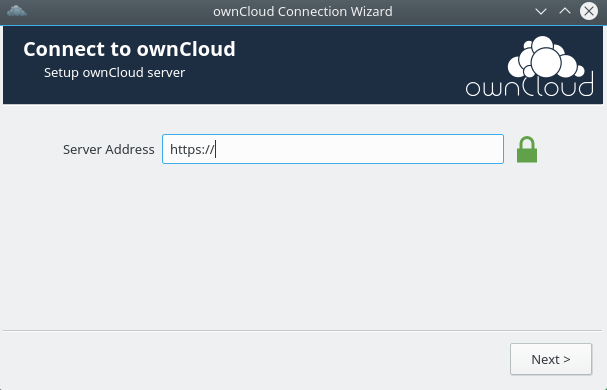
You will be presented with the ownCloud Connection Wizard. Not
surprisingly, the steps are much the same as the Nextcloud Windows
client:
- Enter the URL -
https://cloud1.example.vm/nextcloud - Accept the untrusted certificate
- Enter cloudboy’s username and password
- Accept or modify the syncing defaults
Try changing, adding & deleting files on one device and you should see the file updated on the other device very quickly!
If you’re done and want to restore your iptables rules:
sudo iptables-restore < iptables.copy
Nextcloud Deployment Choices
Your choices for deployment are going to depend on a number of factors. Nextcloud has some deployment recommendations but they are less relevant to me as my use will be personal only at this point.
The two high-level deployment options I need to first consider are:
- Host, along with a VPN (virtual private network), on a home server?
- Host in a private cloud (e.g. Digital Ocean or AWS)?
As I don’t have an existing home server infrastructure I’m going to start with option 2. The cheapest Digital Ocean droplet is only $5/mo. Now there’s only 512MiB of RAM & 20GB of SSD storage. This seems tiny but these days but it is just me and the volume of files I actually want to sync sits at 4GB.
But what if things change and I need to move the application back home or to some other provider? And also, how am I going to test out application upgrades or add-ons & easily deploy them?
Well that’s where docker comes in. With docker, all the Nextcloud dependencies will be contained within a docker image which I can move - with or without the data stored in a docker data volume - from my VM to a Digital Ocean droplet to a home server or anything running a Linux distro that supports the docker engine.
This is, of course, a simplification. So in future articles I’ll outline how this actually works.